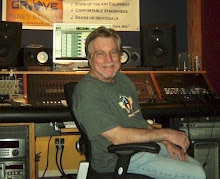
Friday, October 23, 2009

Editing and Mixing


We’ve Only Just Begun...


In my last couple of blogs I told you how to prepare for and what to expect at your recording sessions. Let's say you've carried that out. You’ve laid down tracks of guitars, bass, drums, keyboards, percussion, vocals, and/or background vocals. You ask the engineer to play back a rough mix of what you’ve done. You’re proud of your work and you go home exhausted but exhilarated. Congratulations, you have completed the recording portion of the process. But the job is not over yet; the engineer’s work is far from finished. He’ll be spending many more hours refining your tracks and making them special.

Editing
.

The next step in the process is editing. For many of my Groove Tunes customers who haven't done a lot of recording, editing can be the most important part of the process. Sloppy performances can be tightened up and made to sound really professional. Remember all those “takes” you recorded? I listen carefully to all those takes again and again and I find and assemble all the best parts. I digitally cut, copy, and paste various sections of the recording, make timing alignments, edit out unwanted noises, and perform pitch corrections if necessary. This process can be likened to the editing process of movie production, where much of the filmed (recorded) action is left “on the cutting room floor”. In the final song edits, a high percentage of what was recorded is not used, and much of what is used is edited and cleaned up prior to final mixing. The editing process often takes as long as all the time spent on recording, and then some. So here's a simple hint on how to save money: Make sure you know your parts before you come in to record them. The tighter the performance, the less editing I will have to do, and that will save you bucks.

Mixing.

Mixing is the next step, and in many cases, the final step in the process. Once I've finished editing all the tracks, getting everything cleaned up and on the beat (thanks to that click track), it’s time to decide how the final two-track mix will sound. The mixing process is where art-meets-science. Starting with perhaps dozens of tracks of recorded and edited material, my challenge now is to decide how to blend all these sounds into a pleasant stereo image that flows properly from start to finish. I will decide the relative volume of each track throughout the entire song, where each instrument will sit across the stereo left-right panorama, how to equalize (EQ) the treble and bass of each track, whether compression or limiting are applied and if so how much, and when to add sonic sweeteners such as delays, reverb, and other special effects. Mixing can take anywhere from two to six hours or more per song, depending on the complexity of the music and the overall project budget. I will typically work on a mix for a few hours in order to get a decent mix, then leave the project alone for a day, then come back later with fresh ears and take the mix to the next level of perfection. (At Groove Tunes Studios' ProTools HD digital recording system all mix settings can be saved and called back up automatically at a later date.) This procedure can be repeated over and over until I feel good about the mix and I'm ready to play back my creation for you.


In my next blog I will wrap up this series of blogs by talking about the final steps that take place. Now go practice that lead guitar part -- know it, live it, love it, so that when you come in to record it, you will play it!

Thursday, October 15, 2009

Your Day at the Studio


Get off to a good start!

Now that you’ve done your homework as outlined in the previous article, I've prepared a checklist for you for the day of your session. Most people intuitively get these but sometimes they're worth repeating. So here are a few of the key items to remember for your recording day:

· Take to your session whatever snacks or drinks you may want. Vocalists should bring their own tea or throat lozenges. Have some cash on hand in case someone wants to run out to buy food.
· Arrive at the studio on time. I run a pretty tight ship at Groove Tunes Studios so the recording studio clock starts at the time of the booking, not when the band arrives.
· Do not bring guests to your session. Guests will distract you and the engineer, disrupt and delay the recording process, and they may interfere with your opinion of how the music should sound. There are few things that irritate me more than when a client brings a friend, or worse still, their child. A recording studio is not a nursery.
· Bring your own instruments (the portable ones), the ones you are most used to playing. Unfamiliar instruments can cause surprises, and surprises can cause problems.
· Bring your own guitar amp if it has the sound you want. Some studios may have their own studio amps that you can use. Ask beforehand about them. Also, most studios record the bass guitar “direct” into their console, so a bass amp is usually not required. That's the way I do it at Groove Tunes, and it works great.
· Bring your own guitar pedals and effects, and extra guitar strings and picks. If your electric guitar uses a battery for an active pickup, bring an extra new battery.
· Bring a guitar tuner. Make sure all guitarists and the bass guitarist use the same tuner during the session. Check tuning often, including between takes.
· The drummer may want to bring parts of his kit (snare, cymbals, kick pedal) but it is not always necessary. In fact, I discourage it. Check with me (or your engineer) beforehand. All drum kit change-outs are “on the clock”, so it’s best to keep these to a minimum. The drummer should bring his own sticks.
· Bring several copies of the songs lead sheets (!), two for the studio engineers, plus extra copies for the musicians and vocalists. Everyone will want to make their own marks on their own copies. If you forget to bring lead sheets expect to spend more time marking and charting your songs on studio time.

Ready…Set…Record!

A recording project at a recording studio consists of three main steps: recording, editing, and mixing. Mastering is an optional fourth step that I'll discuss in a later blog. On the day of your recording session at Groove Tunes I will review the recording plan with you at the start. A typical recording sequence for a full-band song is: Determine the proper song tempo and assign that to a click track (I will do this), record a “guide” rhythm guitar track, record a “guide” vocal track, then record: drums, bass guitar, guitars, other instruments, lead vocal, backup vocals, miscellaneous “fills” and “pads”, and additional percussion. Note: The “guide” tracks are thrown away at the end.

If you are planning to record more than one song start with the song that’s the least complicated – the one that’s the easiest to play or sing, and/or the shortest song. Once you have recorded your first song you’ll be more familiar with the process, and your more complicated songs will go more smoothly.

You will be playing or singing your parts several times while the engineer records you. I typically record multiple “takes” of each part. If you make a mistake while recording don’t stop unless I stop you. With ProTools I can piece together portions of different takes during the editing process. I will be listening to all the takes as they are being performed and recorded, and I will decide when I have enough material to work with during the editing process. The people at Groove Tunes Studios who will be working with you are trained in music and sound reproduction, so be open to their gentle coaching during your sessions.

Keep in mind what the main focus of your music is. If it’s the lead vocal (it usually is), plan to spend more time on it.

Make the studio a comfortable and relaxing place. Stay loose and have fun! If you wish to drink alcoholic beverages during your session keep the number to a reasonable level. Alcohol makes you think you are playing better, but the reality is often different. The recording never lies.

Know when to quit for the day. If you’re tired, it will show in the recording.


In my next blog I will talk about what happens after your recording session is over.

Saturday, October 10, 2009

Preparing For Your Recording Session!


In the last blog I talked about why every musician needs to record. This blog covers the next steps, the first of which is:


Selecting a Studio That’s Right for You

Now that I've convinced you to get a professional recording made you will need to decide where to go to get it done. Unless you're already rich and famous and can afford to book Abbey Road Studios in London, you will likely, and wisely, choose a studio located close to your home. Here in Atlanta musicians have a multitude of choices. A recent search for “Recording Studios” in the greater Atlanta area on
www.kudzu.com resulted in over 300 hits! Kudzu.com is a great site to start with. After searching for "recording studios" in their browser you can enter your zip code and search “by distance” from your home. Better yet, try searching “by rating” and find the studios close to your home with the highest customer satisfaction ratings. Call a few of these studios and talk to their owner or chief engineer about your project and try to get a feel for whether you think there’s a fit. Tell them what kind of music you want to record and then ask what types of music the studio specializes in.

These days 99% of all music is recorded digitally. Gone are the days of reel-to-reel analog tape decks. Most current studios use ProTools HD, which is also the industry standard. Avoid falling into the trap of price-shopping. Meet with your prospective engineer and tour his facility in person. Not all studios are created equal. You should have an overall budget in mind but try to remain flexible on pricing because each project is different. Groove Tunes Studios is one of the studios that many musicians in the greater Atlanta area have come to know and trust. Check out Kudzu.com and compare us with other studios in your area. You can find out more about Groove Tunes at
www.groovetunes.com or call 770-842-5511.

Be prepared!

Once you’ve selected your studio and have scheduled a recording date with your engineer or producer, you will need to prepare for your session. Here are a few tips that I give to new clients to help them prepare for their first recording session:

· If possible, record your songs during live gigs or at rehearsals, and then listen to them. Determine whether there are weak spots in the song or performance and fix those before your session date.
· Have all the instrumental and vocal parts already worked out. Know your guitar solos! If you will be relying on Groove Tunes to provide the musicians this may not be as critical for you.
· Check with the studio in advance about guitar amps or other equipment you plan to use.
· Practice to a click track (!!!) or metronome during pre-production rehearsals! Each musician should practice alone to the click, and then together as a group. Most rock and pop music is recorded one track at a time, one instrument at a time, so know how to play your parts to the click track. Being able to do just this much will save you time and money on your project. You should be able to play all your parts exactly the same way, every time.
· Rehearse more songs than you plan to record. There might be a technical or performance problem with a particular song when you arrive at the studio, so it’s always a good idea to have a backup song or two.
· Change your guitar strings two or three days before the session. It’s best if they are just a few days old and not so new that they are still stretching out.
· Prepare lead sheets for the songs you plan to record. Lead sheets are helpful to the engineer and musicians and they make your sessions go smoother. Lead sheets are typed pages containing all the song lyrics with the chords typed or written above the words where each chord changes. Lead sheets should also notate the number of measures and chords for intros, instrumental solos, and other instrumental portions. The lead sheet is the road map for the recording session and those that bring them to sessions save studio time and money.
· Take care of your body before your recording session. Eat well, get enough sleep, and keep your ears rested the night before.

In my next blog I will tell you what to expect at your session. Until then, get thee to thy metronome and start rehearsing!

Monday, October 5, 2009

Why record?


A few months ago I wrote a series of articles collectively titled "Recording Your Music!" that appeared on Dave Craver's website http://www.openmicatlanta.com/. This blog recaps the first of those articles: "Why Record?"
I do a lot of promoting and sponsoring of live music around Atlanta. I have an enormous amount of respect for anyone who will stand in front of a crowd of mostly strangers and sing original material that nobody has heard.
Every performing musician is looking for effective ways to market themselves. If you are a musician who is actively seeking gigging venues around town you need a calling card. Musicians have to sell themselves to club owners and demonstrate how great they are. The club owner is going to want to meet you, but they’re not going to ask you for an on-the-spot live audition. They’re going to want a demo CD. Yep, your best chance to land that gig is to have a killer sounding demo CD ready to give out the instant someone asks for it. And if you’ve recorded your demo at a professional recording studio you’ll have a huge competitive advantage over 95% of the competition who bring in amateurish mixes created in their bedrooms. If you’re serious about selling yourself, you will need a professionally recorded demo.

Even if you don’t plan to gig out there are other reasons why you should record your music. For one, your music (or your sound) is your legacy. Hey, I hate to break this to you, but you’re not going to live forever. A CD recording is a “record” of your talent. It is a tangible and timeless document of who you are and what you were able to do at a certain point of your life. Your life, of finite duration.
Consider for a moment if Jim Morrison or Jimi Hendrix hadn’t recorded their works while they were in their early twenties. Nobody except their family and a few friends would remember them today. What would be the legacy of an author if had he never bothered to write down and publish his thoughts? He would not be remembered as an author. What if a visually-creative artist never purchased a camera, or a paint brush and easel? He might just be remembered by whatever day job he happened to have. The same line of reasoning applies for musicians. Recorded sound is the legacy of all musicians. Without a sound recording, your musical existence is only hearsay.

Recordings that are professionally produced can make you sound amazing, as good as you’ve ever sounded. Your professional recording is something to be proud of, something that you will want to show off and share with loved ones. And if you’re really good, your recordings can lead to financial gain. The only downsides to recording are time and cost. But compared to all the time and treasure you expend during your lifetime perfecting your craft and buying your instruments, the cost of a professional recording is a very small investment, and one that can reap tremendous emotional – if not financial – rewards. You owe it to yourself!
In my next blog I will give you some tips on how to find the right recording studio for you.
- Eric